Gingerbread House
Makes:
gingerbread house (about 9 x 5 inches and 7 ½ inches tall
Category:
Introduction
About this Recipe
Recipe from Back to Baking Whitecap Books, 2011
Ingredients
Royal Icing:
- 2 egg whites
- 2 cups icing sugar, sifted
- 1 tbsp white corn syrup
- 1 tsp lemon juice
Assembly:
- 1 9 x 5-inch loaf pan, ideally with angled sides
- 1 ruler
- 1 piping bag
- 1 small plain tip
- icing sugar for dusting
Step by Step Instructions
Step 1
Preheat the oven to 325°F and line 3 baking trays with parchment paper.
Step 2
On a lightly floured surface, roll out the first disc of gingerbread cookie dough into a rectangle, about 20 inches by 10 inches and ¼ inch thick. Place the top of your loaf pan onto the dough and cut around the edge of the loaf pan to cut out two 9 x 5-inch rectangles—these are your 2 roof pieces. Place these onto a baking tray and bake for about 20 minutes, until they begin to brown around the edges. The gingerbread pieces should become firm after they cool, but if they still feel soft, you can return them to the oven to bake another 5 to 7 minutes.
Step 3
Repeat step 2, but this time use the bottom part of the loaf pan to trace two 8 x 4-inch rectangles from the dough—these are the long sides to your house. Place these on the next baking tray and bake for just under 20 minutes, until they begin to brown around the edges.
Step 4
Make a template for the two end pieces of the house (see notes below). Repeat step 2, but now cut out two end pieces to the house using the template you drew. Place these on the third baking tray and, if you wish, cut out 8 small rectangles from the remaining dough to be window shutters. Bake the small rectangles for about 12 minutes and the end pieces for about 18 minutes, until they just begin to brown around the edges. Let all the house pieces cool completely before assembling.
Step 5
For the royal icing, whip the egg whites with electric beaters or in a mixer fitted with the paddle attachment just to loosen them. Add the icing sugar, corn syrup,and lemon juice, and beat first on low speed to blend, then increase the speed to high until the royal icing is white and fluffy, about 5 minutes. Keep the icing well covered while assembling the gingerbread house (it can be stored in a resealable bag at room temperature—do not refrigerate).
Step 6
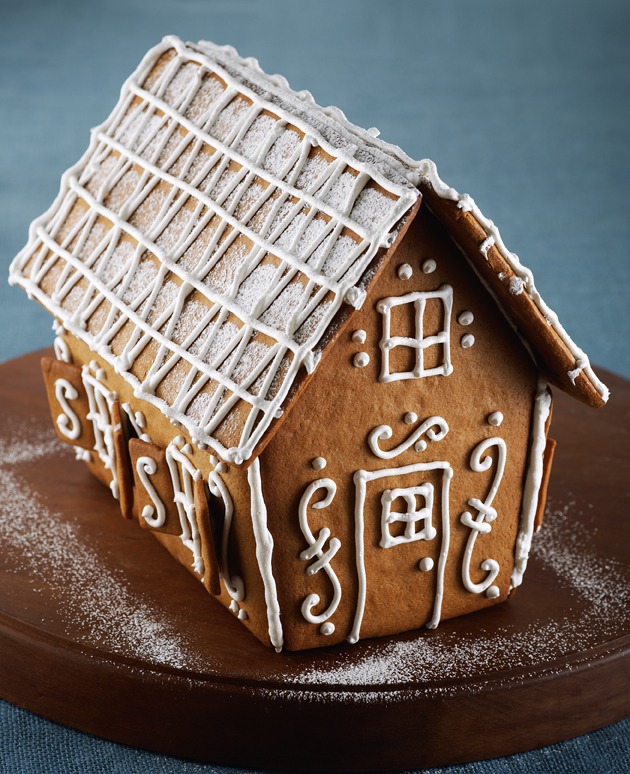
First, paint the décor on each piece of the gingerbread house. This is easiest to do before the house gets assembled. Fill a piping bag fitted with a plain tip with royal icing. Pipe a roof design on the 2 largest pieces, and pipe window frames and any other designs on the long side pieces, adhering the shutters on an angle using the royal icing. Pipe doors and other desired details on the end pieces. Let the icing dry for at least 2 hours.
Step 7
Next, assemble the sides of the house. Pipe royal icing on each edge and stick the side pieces together. You may wish to carefully prop a book against each side to hold it in place as it dries for 2 hours.
Step 8
Lastly, place the roof on the house. Pipe royal icing around the top edges of the assembled sides of the house and place each roof piece on top. Pipe a line of royal icing to join the 2 roof pieces together and let this dry for 2 hours. Stacking a couple of books under the roof edges will hold them in place as they dry.
Step 9
Once dried, the gingerbread house can be moved to a presentation board and dusted with icing sugar, or you can also add additional candy items to it, if you wish.
Step 10
The gingerbread house will keep, uncovered, for up to a week and still be edible, and it will keep for up to a month if it’s used only for décor.

