A Doughnut Forest
A doughnut tower or a doughnut wall can be a creative way to display freshly made doughnuts in an appealing, help-yourself setting.
Makes:
3 dozen doughnuts
Prep Time:
90 minutes
(plus dough making), plus rising
Cook Time:
5 minutes per batch
Category:
Introduction
About this Recipe
Recipe from Baking Day with Anna Olson
Appetite by Random House, 2020
There is a time and place for a whimsical dessert, and heart-shaped anything suits Valentine’s Day, an engagement party or a baby or wedding shower. A doughnut tower or a doughnut wall can be a creative way to display freshly made doughnuts in an appealing, help-yourself setting. Less daunting is a little forest of doughnuts. Remember mug trees? Popular in the 80s, these countertop holders are still available at discount and kitchen stores. Hanging the individual branches with doughnuts creates that dream-like feeling of a forest.

Ingredients
- 2 recipes “Scrispy Scream” Glazed Doughnuts dough
- Vegetable oil, for frying
- 4½ cups (585 g) icing sugar
- ½ cup (125 mL) 1% or 2% milk
- ¼ cup (60 g) unsalted butter, melted and cooled slightly
- 2 tsp vanilla extract
- Pink food colouring paste
- Assorted sprinkles
- Mug trees
NOTES:
If you are creating a doughnut forest for a party, keep your timing in mind. You need time to make your dough and let it rise, cut and fry your doughnuts (up to an hour total), decorate them and give them time to set before arranging. To save you some time on your “event day,” you can make your dough and let it rise slowly in the fridge overnight. Then you can roll and cut the cold dough (it handles easily when chilled), cover and let the cut doughnuts rise for an hour instead of 30 minutes before frying.
Naturally, you can cut out regular round doughnuts or even other shapes to suit the occasion for your doughnut forest. Tint your doughnut glaze and select the sprinkles to suit your theme, whether it be a wedding or engagement, Christmas, Mother’s Day, a birthday . . . really any occasion deserves a doughnut forest!
Step by Step Instructions
Step 1
Prepare the dough in two batches according to the recipe and let the dough rise, large ungreased bowl, covered with plastic wrap, for an hour or until doubled in size. Line two baking trays with parchment paper and set aside.
Step 2
Turn the dough out onto a lightly floured surface. Roll the first piece of dough out to ½ inch (1.2 cm) thick and use a 2- or 2½-inch (5 or 7.5 cm) heart-shaped cookie cutter to cut out doughnuts. Use a small, round cookie cutter or the base of a piping tip to cut out a hole in each doughnut. Set the doughnuts on one of the baking trays, cover with a tea towel and roll out the second piece of dough. Any scraps can be re-rolled and cut, until you get three dozen doughnuts. Cover the remaining doughnuts and let rest for 30 minutes, until the dough does not spring back when gently pressed.
Step 3
Preheat the vegetable oil to 350°F; (180°C;) in a tabletop fryer or in a deep pot set over medium-high heat (fill the pot with 2 inches/5 cm of oil). Line two baking trays with paper towel and set them under two cooling racks.
Step 4
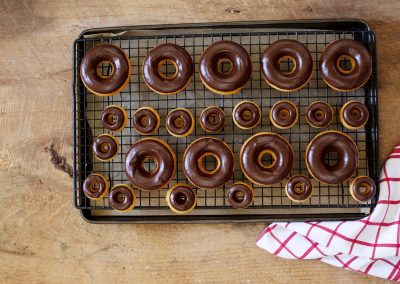
Using a slotted spoon, carefully lower a few doughnuts into the hot oil, leaving enough space so they do not touch, and cook for about 2 minutes. Turn the doughnuts over and cook for another 2 minutes. Lift the doughnuts onto one of the cooling racks to drain and cool. Continue to cook the next batch of doughnuts.
Step 5
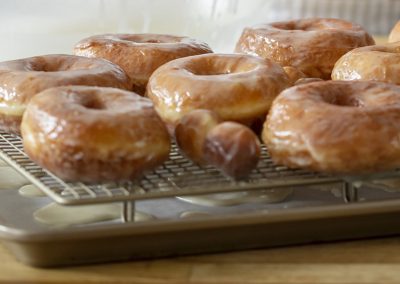
For the glaze, whisk the icing sugar with the milk until smooth, then whisk in the melted butter and vanilla. The glaze should coat a spoon evenly but any excess should drip off with a little shake. If the glaze is too thin, add a little extra icing sugar. If it is too thick, add a little extra milk.
Step 6
Divide the glaze evenly into three bowls. Set one bowl of white glaze aside. Using a toothpick, add a tiny amount of food colouring paste to the second bowl to create a light pink glaze. Add a slightly larger amount of paste to the third bowl to make a more intense pink glaze. Place a sheet of plastic wrap directly on the surface of the glazes if you need to set them aside while you get your decorating station ready.
Step 7
To prepare your decorating station, line several baking trays with parchment paper. Place your sprinkles in individual bowls and set an empty bowl nearby. Arrange the doughnuts at one end of your work station, followed by the bowls of glaze. Set the sprinkles and the empty bowl beside the glaze, and the empty baking trays within reach at the other end of your work station.
Step 8
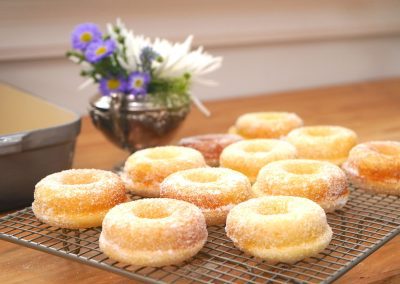
To decorate the doughnuts, dip the top of a doughnut into a glaze and shake off any excess. Hold the doughnut over the empty bowl as you add the sprinkles of your choosing (or dip the glazed doughnut right into sprinkles). Set the doughnut onto a lined baking tray to dry. Decorate the remaining doughnuts and set them aside for an hour to dry.
Step 9
To assemble the forest, hang the doughnuts on the mug trees, mixing up the colours and sprinkle styles as you go. Invite guests to help themselves! The doughnuts are best dipped and served the day they are fried.