Classic Chocolate Layer Cake with Swiss Meringue Buttercream
This moist, rich chocolate cake has a deeply dark chocolate colour but just the right chocolate flavour so that both kids and adults will enjoy it.
Makes:
Makes one 3-layer, 8-inch/20 cm round cake or one 2-layer, 9-inch/23 cm round cake. Serves 12 to 16
Prep Time:
30 minutes, plus cooling & chilling
Cook Time:
35 minutes
Introduction
About this Recipe
Recipe from Baking Day with Anna Olson
Appetite by Random House, 2020
This cake requires no fancy tools, mixers or ingredients—just two or three cake pans, a bowl, a whisk and a spatula (and even a wooden spoon will do just fine)—so younger family members can help make this cake for a brother or sister, mom or dad.

Ingredients
Cake:
- 2 cups (400 g) granulated sugar
- 1¾ cups (260 g) all-purpose flour (see note for gluten-free)
- ¾ cup (90 g) cocoa powder (Dutch process is ideal)
- 2 tsp baking soda
- 1 tsp baking powder (certified gluten-free, if needed)
- ½ tsp fine salt
- 1 cup (250 mL) buttermilk
- 1 cup (250 mL) hot brewed coffee
- ½ cup (125 mL) vegetable oil
- 2 large eggs
- 1 tsp vanilla extract
Buttercream:
- 6 large egg whites, room temperature
- 1⅔ cups (240 g) granulated sugar
- 1⅔ cups (365 g) unsalted butter, room temperature
- 2 tsp pure vanilla extract
- vanilla extract
For gluten-free option:
Replace the 1¾ cups (260 g) all-purpose flour with ⅔ + ½ cup (155 g) brown rice flour mixed with ⅓ cup + ¼ cup (70 g) tapioca starch and ¾ tsp xanthan gum for a tasty, moist result.


Step by Step Instructions
Step 1
Preheat the oven to 350°F (180°C). Grease three 8-inch (20 cm) or two 9-inch (23 cm) round cake pans (see note). Line the bottom of the pans with parchment paper and dust the sides of the pans with flour, knocking out any excess.
Step 2
Sift the sugar, flour, cocoa powder, baking soda, baking powder and salt into a large bowl. Add the buttermilk, coffee, oil, eggs and vanilla to the bowl and whisk vigorously by hand for about a minute, until smooth. Pour the batter into the pans and bake for 30 to 35 minutes, until a tester inserted into the centre of the cake comes out clean.
Step 3
Cool the cakes in their pans on a cooling rack for 30 minutes before turning out to cool completely before frosting. The cake layers can be made a day ahead, wrapped individually and left on the counter before assembling, or they can be frozen for up to 3 months before thawing on the counter.
Step 4
For the buttercream, place the egg whites and sugar in a metal bowl and set over a saucepan filled with 2 inches (5 cm) of gently simmering water. Whisk constantly (but not vigorously) until the mixture reaches 150°F (65°C) on a candy thermometer, about 6 minutes.
Step 5
Use electric beaters or transfer the mixture to the bowl of a stand mixer fitted with the whip attachment and whip at high speed until the meringue has cooled to room temperature (it will hold a stiff peak by then).
Step 6
With the mixer running at high speed, add the butter a few pieces at a time. At first the meringue will hold its volume, then the buttercream will deflate a little and become very creamy yet fluffy looking. Beat in the vanilla. Use immediately, or cover and chill or freeze for later use.
Step 7
To use the frosting once it’s been chilled, let it come to room temperature on the counter. Rewhip the buttercream to make it fluffy and spreadable.
**See below for great tips and techniques for assembling and decorating your cake.


Cake Decorating Tips
Use a cake board
When assembling a cake, set the bottom layer on a cake board so you can easily move your cake from your work area to the fridge, and from the fridge to your presentation plate. Cardboard cake boards come in different shapes and sizes and are often thin enough not to be noticed.
Frost the top first, then the sides
After you’ve stacked your cake layers with your chosen frosting in between them, use a palette knife (offset spatula) to spread a generous amount of frosting over the top of the cake, pushing it just over the outside edge of the cake as you level it. It’s easier to pull away excess frosting than it is to add more, and the frosting hanging over the sides will make creating a precise top edge easier, since the frosting from the top will meet the frosting on the sides without gaps. You can choose to leave the sides of the cake exposed, or to completely mask the cake, use your palette knife to spread generous amounts of frosting onto the sides, spreading to distribute evenly as you rotate the cake. You can use a bench scraper, with its 90 degree angle to pull away excess frosting from the sides as you rotate the cake, and ensure the sides are perfectly straight. As this meets the frosting hanging over from the top, you can spread it to meet at the top edge and and push upwards, so that the frosting on the sides pushes just above that top edge.
Slice your cake straight
Use a serrated knife when you have to slice a cake horizontally into layers, so that you get a clean cut with minimal crumbs. To get level layers, it’s best to slice from the outside inward. Start by slicing your cake just an inch inward, then turn the cake, so you can keep an eye on your knife remaining level and centred. As you turn the cake, continue slicing inward until you reach the centre of the cake, and then you’ll find the top portion releases easily and both layers with be even.
Get a clean edge
To create precise edge, use your offset spatula or bench scraper to coax the frosting from the sides up to meet the frosting from the top and let it push about 1/2-inch (12 mm) above the top of the cake. Then, with your flat side of your spatula parallel to the top of the cake, pull that excess frosting from the outside into the centre of the top of the cake – this helps to level the top of the cake further and yields a clean edge.
Use a cake turntable
If you are getting serious about cakes, a cake turntable (also called a cake wheel) makes it easier to get straight sides and a level top to your cake, and its elevation ensures that cake decorating is not back-breaking! When using a cake turntable, spin it with one hand while you press an offset spatula or straight-edged bench scraper against the side of the cake, pulling away excess frosting and giving the frosting a clean, unmarked surface. Give your cake a good look at eye level while spinning, to ensure it is perfectly straight at every turn.
Decide on your Decor
Once you have the initial frosting smooth and level, pick your style of decoration. There are a number of frosting décor styles to choose from, including plain, naked/sheer, and textured.
Plain
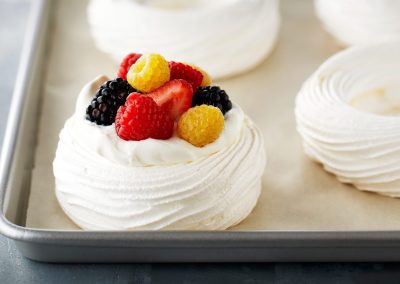
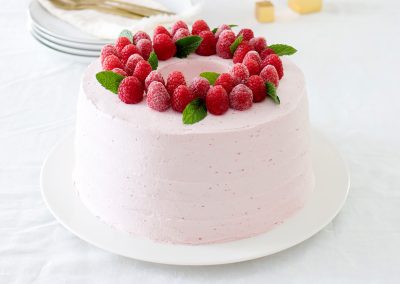
once you’ve achieved a straight top (and sides, if frosting) to your cake, you can leave it as, it is, in its simple elegance. A fresh flower or two, some fresh fruit, or happy birthday written in chocolate may be all that your cake needs. You could even leave the top edge of the cake unfinished, giving the cake a rustic chic look.
Textured
While the frosting is still pliable, you can use your offset spatula to coax swirls, curls and swishes into the frosting. Another textured look is to press the tip of your offset spatula against the side of the cake at the very bottom and then spin the cake as your spatula spirals upwards creating a nice line.
Naked/sheer
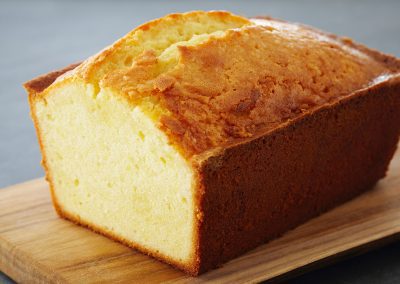
Using an offset spatula or bench scraper, pull away most of the frosting from the sides of the cake, to reveal the contrast between the cake layers and the frosting in between them. Leave the frosting layer on top intact.
Add sprinkles or piping
Sprinkles are best added to a cake before it is chilled and before any piping detail is done, so that you can control where they land. Place the sprinkles into a pie plate or other shallow dish, then lift the cake (hence the need for a cake board) and hold it carefully at a slight angle over the sprinkle dish. Press the sprinkles on, letting any that don’t stick fall back into the dish.
For piping, chill the cake for an hour first. For many decorating styles, I prefer using large piping bags and large piping tips, for maximum coverage. Plain and star tips are easiest to work with. To fill your piping bag, open the bag and hold it in your hand with the top folded over your hand, as you scoop frosting into it with your other hand (holding your hand in a C-shape keeps the piping bag in place, and also you to scrape your frosting-laden spatula against your hand within the bag, keeping things tidy). Twist the piping bag at the frosting level and give it a good twist. You can use an elastic band to secure the frosting, or simply hold the twist in place at the base of your thumb and forefinger as you pipe, and guide the tip with your other hand. Try and avoid squeezing the frosting from the middle of the bag – the heat of your hand may warm the frosting, and then it won’t hold its detail.
I like to try out a sample piping onto a plate before I do it for real on the cake. Piping with the icing that is the same colour as the cake means you can easily scrape any mistakes off for a fresh start.